Previewing your capture settings in Pinnacle Studio

on Saturday, May 31, 2008


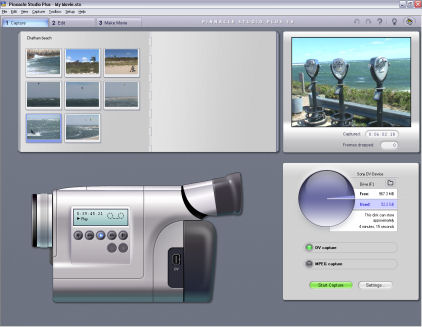
Pinnacle Studio’s Preview capture mode is an excellent tool because it lets you store more source material on your hard disk for editing purposes without using up quite so much disk space. Like MPEG capture, if you choose the Preview preset in the main capture window and then click Settings, you’ll have a group of sub-presets to choose from on the Capture Format tab. It’s usually best to just use one of the sub-presets, but if you choose Custom quality, you can adjust the following settings:
  • List All Codecs: Choose this option to list all of the codecs that are installed on your system. (Codecs are compressor/decompressor schemes for audio and video) I really don’t recommend using this option because some of the codecs installed on your computer may not be compatible with the Pinnacle Studio software.
  • Compression: Here you can choose a specific codec if you wish. For most preview captures, the Intel Indeo Video R3.2 or PCLEPIM1 32-bit Compressor codecs are fine.
  • Width and Height: Choose a custom size for the video if you wish.
  • Remember, the smaller the size, the less hard-disk space will be needed. If you’re using a PIM1 codec, I recommend a frame size of 352 x 240 or smaller. For Indeo codecs, use 360 x 240 or smaller.
  • Frame rate: The default frame rate for NTSC video is 29.97, but your files will be much smaller if you choose 14.985. If you’re working with PAL video, you can choose a frame rate of 25 or 12.5. A lower frame rate means the video image won’t be quite as smooth, but because it’s only preview quality, this usually isn’t a big deal.
  • Quality or Data Rate: Select either the Quality or Data Rate radio button, and then use this slider to adjust the quality or data rate for the capture. It doesn’t really matter if you choose Quality or Data Rate; the end result will be the same. Remember, lower quality (or data rate) means smaller file sizes.
  • Include Audio: Deselect this option if you only want to capture video.
  • Channels: Choose between 16-bit stereo (better audio quality) or 16-bit mono (smaller files).
  • Sample Rate: You can probably say it with me by now: Higher sample rates provide better quality, lower sample rates mean smaller files. When you’re done setting capture format options, click OK to close the Pinnacle Studio Setup Options dialog box.

Checking MPEG capture settings in Pinnacle Studio

on


If you’re using the MPEG preset (your current preset is shown in the drop-down list in the upper left corner of the Capture Format tab), you can choose a standard group of settings or customize your settings.
MPEG capture settings that you can adjust include these:
  • Sub-Preset: Choose a sub-preset from the menu. Sub-presets include High quality (DVD), Medium quality (SVCD), Low quality (Video CD), and Custom. If you choose Custom, you can modify the remaining settings. If you choose the High, Medium, or Low quality sub-presets, the remaining options will by grayed out.
  • MPEG Type: Choose MPEG1 if you want to make sure that your final movie will be compatible with the widest variety of computers, or choose MPEG2 for slightly better quality.
  • Resolution: This is the screen size in width and height in pixels of the image you will capture. The size for full-quality DV is 720 x 480. Smaller sizes mean a smaller image, but it also means the files sizes for your video will be much smaller.
  • Pre-Filter: If you’re capturing at a smaller resolution, select this check box to improve the appearance of the image slightly (at the cost of absolute sharpness).
  • Fast Encode: This option speeds up the capture process, but it can reduce quality.
  • Data Rate: You can fine-tune quality and file size by adjusting data rate. To adjust data rate, move the slider back and forth. Lower data rates mean smaller files but also lower quality. In most cases, I recommend you keep the default data rate setting.
  • Include Audio: If you only want to capture the video image from your tape and not the audio, uncheck this option.
  • MPEG Capture: This menu helps you tailor capture to the speed of your computer. The safest option is to simply leave Use Default Encoding Mode selected. If your computer is very fast (2 GHz or faster processor), you can make capture more efficient with the Encode in Real Time option. If your computer is slower (slower than 1 GHz processor), choose Encode After Capturing if you encounter dropped frames or other problems during capture.
When you’re done setting capture format options, click OK to close the Pinnacle Studio Setup Options dialog box.

Setting capture options in Pinnacle Studio

on


Pinnacle Studio has some really cool options for capturing video. Unlike most affordable video-editing software, Studio supports online and offline editing.
Studio facilitates offline editing using the Preview-quality capture mode. When capturing video with Studio, you can choose one of three basic quality settings:
  • DV full-quality capture: Choose this option if you plan to export your movie back to videotape — and you have a generous amount of harddisk space to use.
  • MPEG full-quality capture: Choose this option if you plan to output your video to a VCD, S-VCD, DVD, or the Internet. MPEG capture can be customized further using some sub-options described in the next section.
  • Preview-quality capture: Choose this option if you want to capture a lot of video to your hard disk but storage space is a concern. With this option, Studio captures video at a lower quality, which results in a smaller file size. Later, when you’re done editing, Studio recaptures — at full DV quality — only the portions you want for your final movie; all your edits are automatically applied to the full-quality video. If you’re not quite satisfied with the quality of the preview you get, you can customize Preview-quality capture with sub-options described later.
In addition to the three basic quality settings, Studio provides you with a variety of other capture options. You can find them in the lower-right portion of the screen. One of the things you can customize is the storage location for your captured video, often called the scratch disk.

Click the folder icon to review the scratch disk folder and change it if you wish. For example, you may have a second hard disk that you wish to use for video storage. The default location for your scratch disk is

My Documents\Pinnacle Studio\Captured Video

This folder is created automatically when you install Studio on your computer. You can also specify a variety of other capture settings. Click the Settings button in the lower-right corner of the screen to open the Pinnacle Studio Setup Options dialog box. Click the Capture Source tab to bring it to the Front.
This dialog box contains a lot of options and settings, but only two of them are really important for right now. First of all, I strongly recommend that you remove the check mark next to Capture Preview. When this option is enabled, Studio shows a preview of the video on-screen as you capture it. This preview uses up valuable memory and processor power that is better devoted to the actual video-capture process. You will still be able to view the video on the LCD display or viewfinder of your camcorder, so the on-screen preview is redundant anyway.

Second, review the scene detection settings. Studio can automatically detect when one scene ends and another begins and automatically turn each scene into a separate video clip. This comes in handy during editing, but if you don’t like the feature, you can click the No Auto Scene Detection — Press Space Bar to Create Scene radio button.
After you have changed these settings, click the Capture Format tab to bring it to the front. If you are using the DV capture preset, you won’t be able to customize any of the settings on this tab. But if you are using the MPEG or Preview preset, you will be able to adjust some options as described in the next two sections.

Capturing video in Pinnacle Studio

on


Pinnacle Studio for Windows offers an amazing level of moviemaking power for its price. The software is available by itself for a suggested retail price of $99, or you can buy it bundled with digital (FireWire) or analog video-capture cards for about $30 more. The top-of-the-line Studio package is Pinnacle Studio Deluxe (which retails for about $299), which includes the Studio software, capture hardware for both digital and analog video, and the Hollywood FX plug-in (which adds advanced video-editing tools to the basic Studio package).
A trial version of Studio can be installed from the companion CD-ROM for this book. See Appendix A for details.
To begin the capture process in Studio, click the Capture mode button or choose View➪Capture.

How to connect a digital camcorder to your computer?

on


Before you can edit video on your computer, you need to get the video into the computer somehow. Sorry, a shoehorn won’t work — usually you connect a cable between your camcorder and the FireWire or USB port on your computer. Of the two, FireWire (also called IEEE-1394) is usually preferable. FireWire ports have two basic styles: 6-pin and 4-pin. The FireWire port on your computer probably uses a 6-pin connector, and the port on your camcorder probably uses a 4-pin connector. This means you’ll probably have to buy a 6-pin to 4-pin FireWire cable if you don’t already have one. The FireWire connector on your camcorder may not be labeled “FireWire.” It may be called IEEE-1394 (the “official” term for FireWire), DV, or i.Link. Whatever it’s called, if the camcorder is, it’s FireWire-compatible. FireWire is a “hot-swappable” port technology. This means you don’t have to turn the power off on your computer when you want to connect a camcorder or other FireWire device to a FireWire port. Just plug it in, turn it on, and away you go. (Meanwhile, you may want to practice saying buzzwords like “hot-swappable” with a straight face.)

Connect the FireWire cable between the camcorder and your computer, and then turn on the power on your camcorder. Your camcorder probably has two power modes. One is a camera mode, which is the mode you use when you shoot video. The second mode is a player or VTR mode. This second mode is the one you want to turn on when you prepare to capture video from the camcorder’s tape into your computer.
When you turn on the camcorder, your Windows PC will probably chime and then display the Digital Video Device window, which asks you what you want to do. This window is one of those handy yet slightly-annoying features that tries to make everything more automatic in Windows. Click Cancel to close that window for now.
One really cool feature of FireWire is a technology called device control. In effect, it allows software on your computer to control devices that are connected to your FireWire ports — including digital camcorders. This means that when you want to play, rewind, or pause video playback on the camcorder, you can usually do it using Play, Rewind, Pause, and other control buttons in your Pinnacle Studio or Apple iMovie application. Some camcorders can use USB (Universal Serial Bus) ports instead of FireWire ports. The nice thing about USB ports is that — unlike FireWire ports — virtually all PCs made in the last five years have them. The not-sonice thing is that most USB ports are too slow to handle full-quality video. Pinnacle Studio and Apple iMovie can capture from USB cameras using the same procedures described in this chapter for FireWire capture, but you may find that the video quality is reduced. Thus, I recommend that you use FireWire whenever possible.

Making room for video files

on Thursday, May 8, 2008


Video files need a lot of space. Digital video typically uses 3.6 MB (megabytes) of space per second, which (if you do the math) means that 1GB (gigabyte) will hold about five minutes of video. You’ll also need working space on the hard disk — so figure out approximately how much video you want to capture and multiply that number by four. For example, if you want to capture about 15 minutes of video, you’ll need at least 3GB of disk space to store it. Multiply that by four (as a rule of thumb) to figure out that you should have at least 12GB of free space on your hard disk to get the job done.
When I say you need at least 12GB of space for 15 minutes of video, I do mean at least. Even though hard disk space may appear empty, your operating system — as well as your video-editing program — has to use that empty space periodically while working in the background. When it comes to harddisk space, more really is better when you’re working with video. The first thing you need to do is figure out how much free space is available on your hard disk. In Windows, open My Computer (Start➪My Computer). Right-click the icon representing your hard disk; choose Properties from the menu that appears. A Properties dialog box appears. It tells you (among other things) how much free space is available. Click OK to close the box.
On a Macintosh, click the icon for your hard disk just once; then press Ô+I. An Info dialog box appears, showing you how much free space is available. Click the Close button or press Ô+Q to close the Info dialog box. some things to consider:
  • Take out the garbage. Empty the Recycle Bin (Windows) or Trash (Mac).
  • Clean up unneeded Internet files. The cache for your Web browser could be taking up a lot of hard-disk space. The Windows Disk Cleanup utility can help you get rid of these and other unnecessary files. On a Mac, you can empty the cache or control how much disk space is devoted to cache using the Preferences window for your Web browser.
  • Add a hard disk to your computer. Adding a second hard disk to your computer can be a little complicated, but it’s certainly one good way to gain more storage space.

Preparing for Digital Video Capture

on


The process of transferring video into your computer is often called capturing. Capturing digital video is pretty easy, but you should take some specific steps to ensure everything goes smoothly:
  • Install your hardware. Your computer needs the right components to capture video — which means (among other things) having a FireWire or other capture card installed.
  • Turn off unnecessary programs. If you are like most people, you probably have several different programs running on your computer right now. Video capture requires a lot of available memory and processor power, and every running program on your computer uses some of those resources. E-mail, Web browser, and MP3 jukebox? Close ’em down. Cute desktop schemes and screen savers? Disable those too. I even recommend that you temporarily disable your antivirus software during video capture. If you’re using Windows, take a look at the System Tray. (That’s the area in the lower right corner of your screen, next to the clock.) Every little icon you see down there is a running program. Right-click each icon and close or disable as many of them as possible. You don’t have to get rid of every single item, but do try to close or disable as many as possible. After all, it’s a temporary arrangement. You should also disable your Internet connection during video capture as well. You can reactivate System Tray items later— including your antivirus software— by simply restarting your computer. If you’re using a Macintosh, look at the OS X Dock to make sure your programs are closed To quit a program, click its icon in the Dock and press Ô+Q. The only icon you won’t be able to quit is the Finder, of course.
  • Defragment your hard disk. When your computer’s operating system puts files on your hard disk, those files may wind up spread all over the place. This means that even if you have 60GB of free space, that 60GB might be broken up into little chunks here and there. This can cause trouble during video capture, especially with Windows machines, and most especially with version of Windows before Windows XP (such as Windows Me). Even if you have a Mac, it’s still a good regular computer maintenance practice, and if you experience dropped frames during video capture, defragmentation can only help. I recommend you defragment your hard disk monthly, or right before video capture if the disk hasn’t been defragmented recently. Defragmentation organizes the files on your hard disk so that the empty space will be in larger, more usable chunks. Some computer experts will probably tell you that defragmentation isn’t as important with modern operating systems like OS X and Windows XP, but that advice does not really apply when you’re working with video. Video is one of the few remaining tasks which still requires a defragmented hard disk. To defragment a hard disk in Windows, choose Start➪All Programs➪ Accessories➪System Tools➪Disk Defragmenter. Choose the hard disk you want to defragment, and click Defragment (Windows XP) or OK (Windows Me and earlier). The Macintosh OS doesn’t come with a built-in defragmenter, but you can use an aftermarket defragmentation utility such as Norton Disk-Doctor or Apple Disk First Aid.
  • Make sure you have enough hard-disk space. Why is the process of transferring video to the hard disk called capturing instead of just copying? Even though the video is stored as digital data on your camcorder tape, that data must be turned into a computer file in order to be stored on your hard disk. Capturing is the process of turning video data into a computer file.

Advanced checklist of Video Production

on


If you’re planning a slightly more format video shoot, you’ll probably want to bring the items on the basic checklist as well as these more advanced items:
• Lights
• Clothes/wardrobe for the cast
• Make-up and hair-care items
• Fans (to simulate wind and mess up that hair you just combed)
• Extension cords
• Reflectors
• Stool
• Backdrop
• Clamps
• AC adapter and/or battery charger for camcorder
• Microphone
• Audio recorder (don’t forget batteries and blank audio tapes or MiniDiscs)
• Slate
• Script

Basic Checklist of a Video Production

on Saturday, May 3, 2008


This basic checklist includes important items that you’ll need on virtually any shoot, no matter how informal:
  • Camcorder
  • Your camcorder owner’s manual
  • Extra charged batteries
  • Spare blank tapes
  • Lens cleaner
  • Lens filters
  • Tripod
  • Duct tape
  • Camcorder accessories (remote control, telephoto lens, and so on)
  • Scene list

How to create your own sound effects for digital video production?

on


As you watch a TV show or movie, it is easy to forget that many of the subtle little sounds you hear are actually sound effects that were added in during editing, rather than “real” sounds that were recorded with the video image. This is often because the microphone was focused on the voice of a speaking subject as opposed to other actions in the scene. Subtle sounds like footsteps, a knock on the door, or splashing water are often recorded separately and added to the movie later. These sound effects are often called Foley sounds by movie pros, and someone who makes Foley sounds is called a Foley artist. Foley sound effects are named after audio pioneer Jack Foley, who invented the technique in the 1950s.

Recording your own sound effects is pretty easy. Many sounds will actually sound better in a video project if they’re simulated, as opposed to recording the real thing. For example:
  • Breaking bone: Snap carrots or celery in half. Fruit and vegetables can be used to produce many disgusting sounds, and they don’t complain about being broken in half nearly as much as human actors.
  • Buzzing insect: Wrap wax paper tightly around a comb, place your lips so that they are just barely touching the paper, and hum so that the wax paper makes a buzzing sound.
  • Fire: Crumple cellophane or wax paper to simulate the sound of a crackling fire.
  • Footsteps: Hold two shoes and tap the heels together followed by the toes. Experiment with different shoe types for different sounds. This may take some practice to get the timing of each footstep just right.
  • Gravel or snow: Walk on cat litter to simulate the sound of walking through snow or gravel.
  • Horse hooves: This is one of the classic sound effects. The clop-clopclopping of horse hooves is often made by clapping two halves of a coconut shell together.
  • Kiss: Pucker up and give your forearm a nice big smooch to make the sound of a kiss.
  • Punch: Punch a raw piece of steak or a raw chicken.
  • Thunder: Shake a large piece of sheet metal to simulate a thunderstorm.
  • Town bell: To replicate the sound of a large bell ringing, hold the handle of a metal stew pot lid, and tap the edge with a spoon or other metal object. Experiment with various strikers and lids for just the right effect.
Some sound effects might be included with your editing software or are available for download. Pinnacle Studio, for example, comes with a diverse library of sound effects, which you can access by clicking the Show Sound Effects tab or choosing Album➪Sound Effects. If the sound effects aren’t currently listed, navigate to the folder C:\Program Files\Pinnacle\Studio 8\ Sound Effects, and then open one of the thirteen sound-effect category folders such as \Animals or \Squeaks.
Apple iMovie 3 also includes some built-in sound effects. Open iMovie and click the Audio button. To view a list of sound effects, make sure you have iMovie Sound Effects listed in the menu at the top of the audio browser). You may also be able to download additional sound effects periodically from www.apple.com/imovie/audio_effects.html. If you use Windows Movie Maker, you may be able to download free sound effects from Microsoft. Visit www.microsoft.com/windowsxp/moviemaker/ and look for links to downloadable sound effects. If you are using another video-editing program, check the documentation or visit the publisher’s Web site to see whether free sound effects are available.

How to manage ambient noise during digital video production?

on


Ambient noise is the general noise that we don’t usually think much about because it surrounds us constantly. Ambient noise might come from chirping birds, an airplane flying overhead, chattering bystanders, passing cars, a blowing furnace, the little fans spinning inside your computer, and even the tiny motor turning the tape reels in your camcorder or tape recorder. Although it’s easy to tune out these noises when you’re immersed in them, they’ll turn up loud and ugly in your audio recordings later on. If you’re recording outdoors or in a public gathering place, you probably can’t do much to eliminate the actual sources of ambient noise. But wherever you are recording, you can take some basic steps to manage ambient noise:
  • Use a microphone: I know, this is about the millionth time I’ve said it, but a microphone placed close to your subject will go a long way towards ensuring that the sound you actually want to record is not totally overwhelmed by ambient noise.
  • Wear headphones: Camcorders and tape recorders almost always have headphone jacks. If you plug headphones into the headphone jack you can listen to the audio that is actually being recorded, and possibly detect potential problems.
  • Shield the camcorder’s mic from wind: A gentle breeze may seem almost silent to your ear, but the camcorder’s microphone may pick it up as a loud roar that overwhelms all other sound. If nothing else, you can position your hand to block wind from blowing directly across the screen on the front of your camcorder’s mic.
  • Try to minimize sound reflection: Audio waves reflect off any hard surface, which can cause echoing in a recording. Hanging blankets on walls and other hard surfaces will significantly reduce reflection.
  • Turn off fans, heaters, and air conditioners: Air rushing through vents creates a surprising amount of unwanted ambient noise. If possible, temporarily turn off your furnace, air conditioner, or fans while you record your audio.
  • Turn off cell phones and pagers: You know how annoying it is when someone’s cell phone rings while you’re trying to watch a movie; just imagine how bothersome it is when you’re making a movie! Make sure that you and everyone else on the set turns those things off. Even the sound of a vibrating pager might be picked up by your microphones.
  • Shut down your computer: Obviously this is impossible if you are recording using a microphone that is connected to your computer, but computers do tend to make a lot of noise, so shut them down if you can.
  • Warn everyone else to be quiet: If anyone else is in the building or general area, ask them to be quiet while you are recording audio. Noises from the next room may be muffled, but they still contribute to ambient noise. Likewise, you may want to wait until your neighbor is done mowing his lawn before recording your audio.
  • Record and preview some audio: Record a little bit of audio, and then play it back. This might help you identify ambient noise or other audio problems.