What did iMovie do with my audio?

on Monday, September 29, 2008

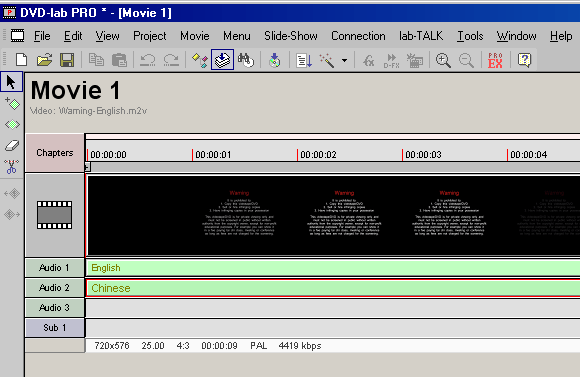
Apple iMovie 3 offers some useful improvements over previous versions of the software — and a few changes that are less welcome. One thing I find a little aggravating is that the timeline does not automatically show the audio clips that accompany video clips. Each clip in the timeline includes both audio and video, but the timeline shows only a single track. To view combined audio and video clips separately in iMovie, you must
extract the audio from each video clip individually. To do so, follow these steps:
  1. Click once on a clip in the timeline to select it.
  2. Choose Advanced➪Extract Audio, or press Ô+J. The audio will now appear as a separate clip in the timeline.
  3. Repeat Steps 1 and 2 for each clip in the timeline. It may be a good idea to wait until later (like, when you’re done editing the video portion of the movie) to extract audio from your video clips. If you still need to trim the video clip, you’ll have to trim the audio clip separately if it has been extracted

How to lock timeline tracks in Pinnacle Studio?

on

Pinnacle Studio offers a handy locking feature on timeline tracks. Locking the track doesn’t prevent burglars from stealing it late at night, but it does allow you to temporarily protect a track from changes as you manipulate other tracks. For example, if you want to delete the audio track that came with some video, but you don’t want to delete the video itself, follow these steps:
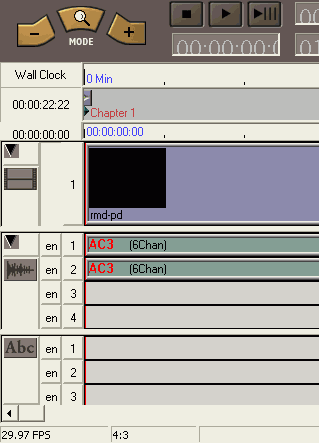
  1. Click the track header on the left side of the timeline. A lock icon appears on the track header, and a striped gray background is applied to that track.
  2. Perform edits on other tracks. For example, if you want to delete the audio track for one of your video clips, click the audio clip once to select it, and then press Delete on your keyboard. The audio portion of the clip disappears, but the video clip remains unaffected.
  3. Click the track header again to unlock the track. You can undo changes (such as deleting an audio clip) in Pinnacle Studio by pressing Ctrl+Z. If you followed the steps just given, press Ctrl+Z once to relock the track, and then press Ctrl+Z again to undelete the audio clip.

Tracking timeline tracks

on Saturday, September 13, 2008


As you look at the timeline in your editing software, you’ll notice that it displays several different tracks. Each track represents a different element of the movie — video resides on the video track; audio resides on the audio track. You may have additional tracks available as well, such as title tracks or music.
Some advanced video-editing programs (such as Adobe Premiere and Final Cut Pro) allow you to have many separate video and audio tracks in a single project. This advanced capability is useful for layering many different elements and performing some advanced editing techniques. When you record and capture video, you usually capture audio along with it. When you place one of these video clips in the timeline, the accompanying audio appears just underneath it in the audio track. Seeing the audio and video tracks separately is important for a variety of editing purposes.

Zooming in and out on the timeline

on


Depending on how big your movie project is, you may find that clips on the timeline are often either too wide or too narrow to work with effectively. To rectify this situation, adjust the zoom level of the timeline. You can either zoom in and see more detail, or zoom out and see more of the movie. To adjust zoom, follow these steps:
  • Apple iMovie: Adjust the Zoom slider control in the lower left corner of the timeline.
  • Microsoft Windows Movie Maker: Click the Zoom In or Zoom Out magnifying glass buttons above the timeline, or press Page Down to zoom in and Page Up to zoom out.
  • Pinnacle Studio: Press the + key to zoom in, or press the - key to zoom out. Alternatively, hover your mouse pointer over the timeline ruler so the pointer becomes a clock, and then click-and-drag left or right on the ruler to adjust zoom.

Using the timeline

on


Some experienced editors prefer to skip the storyboard and go straight to the timeline because it provides more information and precise control over your movie project. To switch to the timeline, click the timeline button.
One of the first things you’ll probably notice about the timeline is that not all clips are the same size. In the timeline view, the width of each clip represents the length (in time) of that clip, unlike in storyboard view, where each clip appears to be the same size. In timeline view, longer clips are wider, shorter clips are narrower.
Adding a clip to the timeline is a lot like placing clips in the storyboard. Just use drag-and-drop to move clips from the clip browser to the timeline. Clips that fall after the insert are automatically shifted over to make room for the inserted clip.

Visualizing your video project with storyboards

on


If you’ve ever watched a “making of” documentary for a movie, you’ve probably seen filmmakers working with a storyboard. It looks like a giant comic strip where each panel illustrates a new scene in the movie. The storyboard in your video-editing program works the same way. You can toss scenes in the storyboard, move them around, remove scenes again, and just generally put your clips into the basic order in which you want them to appear in the movie. The storyboard is a great place to visualize the overall concept and flow of your movie.
To add clips to the storyboard, simply drag them from the clip browser down to the storyboard at the bottom of the screen.
The storyboard should show a series of thumbnails. If your screen doesn’t quite look like this, you may need to switch to the storyboard view. The storyboard is possibly one of the most aptly named items in any videoediting program because the thumbnails actually do tell the basic story of your movie. The storyboard is pretty easy to manipulate. If you don’t like the order of things, just click-and-drag clips to new locations. If you want to remove a clip from the storyboard in iMovie, Studio, or most any other editing program, click the offending clip once to select it and then press Delete on your keyboard.

Turning Your Clips into a Movie

on

You’re probably wondering when the fun begins. This is it! It’s finally time to start assembling your various video clips into a movie. Most video-editing programs provide the same two basic tools to help you assemble a movie:
  • Storyboard: This is where you throw clips together in a basic sequence from start to finish — think of it as a rough draft of your movie.
  • Timeline: After your clips are assembled in the storyboard, you can switch over to the timeline to fine-tune the movie and make more advanced edits. The timeline is where you apply the final polish.
The storyboard and timeline are basically just two different ways of showing the same thing. In most editing programs — including iMovie, Studio, and Windows Movie Maker — you can toggle back and forth between the storyboard and timeline whenever you want. Some people prefer to use one or the other exclusively; for now, starting with the storyboard will keep it simple.